Plotting and programming in Python
Helmholtz Information & Data Science Academy
Tutor: Jose Robledo
03-04 November 2025
Introduction
Introduction to programming in Python 3 for people with little or no previous programming experience.
Create a folder locally for this course. If not familiarized with bash, create folder manually. If familiarized with bash, open a terminal and write:
cd $HOME # change to home directory
mkdir python_course_2025 # create folder in home directory
cd python_course_2025 # change directory to new folder
Download and unzip in the folder data files that we will need.
mv ~/Downloads/python-novice-gapminder-data.zip # bring the zip file to new folder
unzip python-novice-gapminder-data.zip # unzip the file in this folder.
We have our directory ready to work on.
What is Python?
Python is a high-level, widely used, programming language.
Nice features:
- cross-platform
- low barrier to start and understand: focuses on readability and simplicity
- open-source
- general purpose
- Automatic memory management
- Intepreted (slower execution but faster development)
- A great option for science!
If you have python installed, then opening a terminal and writing:
$ python --version
should print your python version. If no python executable is found, this means one of two things:
- you do not have python installed
- you do not have the python binary in your
PATH.
PATH is a bash environment variable where your terminal searches to find executable binaries. This topic is not covered in this course, but feel free to ask if you have doubts on how this works and how to fix path related problems.
If you have python installed, then by executing the python command, you should open an interactive session (the REPL: Read–Eval–Print Loop), which should look something like this
$ python
Python 3.9.6 (default, Apr 30 2025, 02:07:17)
[Clang 17.0.0 (clang-1700.0.13.5)] on darwin
Type "help", "copyright", "credits" or "license" for more information.
>>>
to exit it, type exit() in the line with >>>:
>>> exit()
Yo should be back on your terminal environment. Mind the parenthesis ().
Python Virtual Environments
To get started, we need to setup our virtual environment... but what is this?
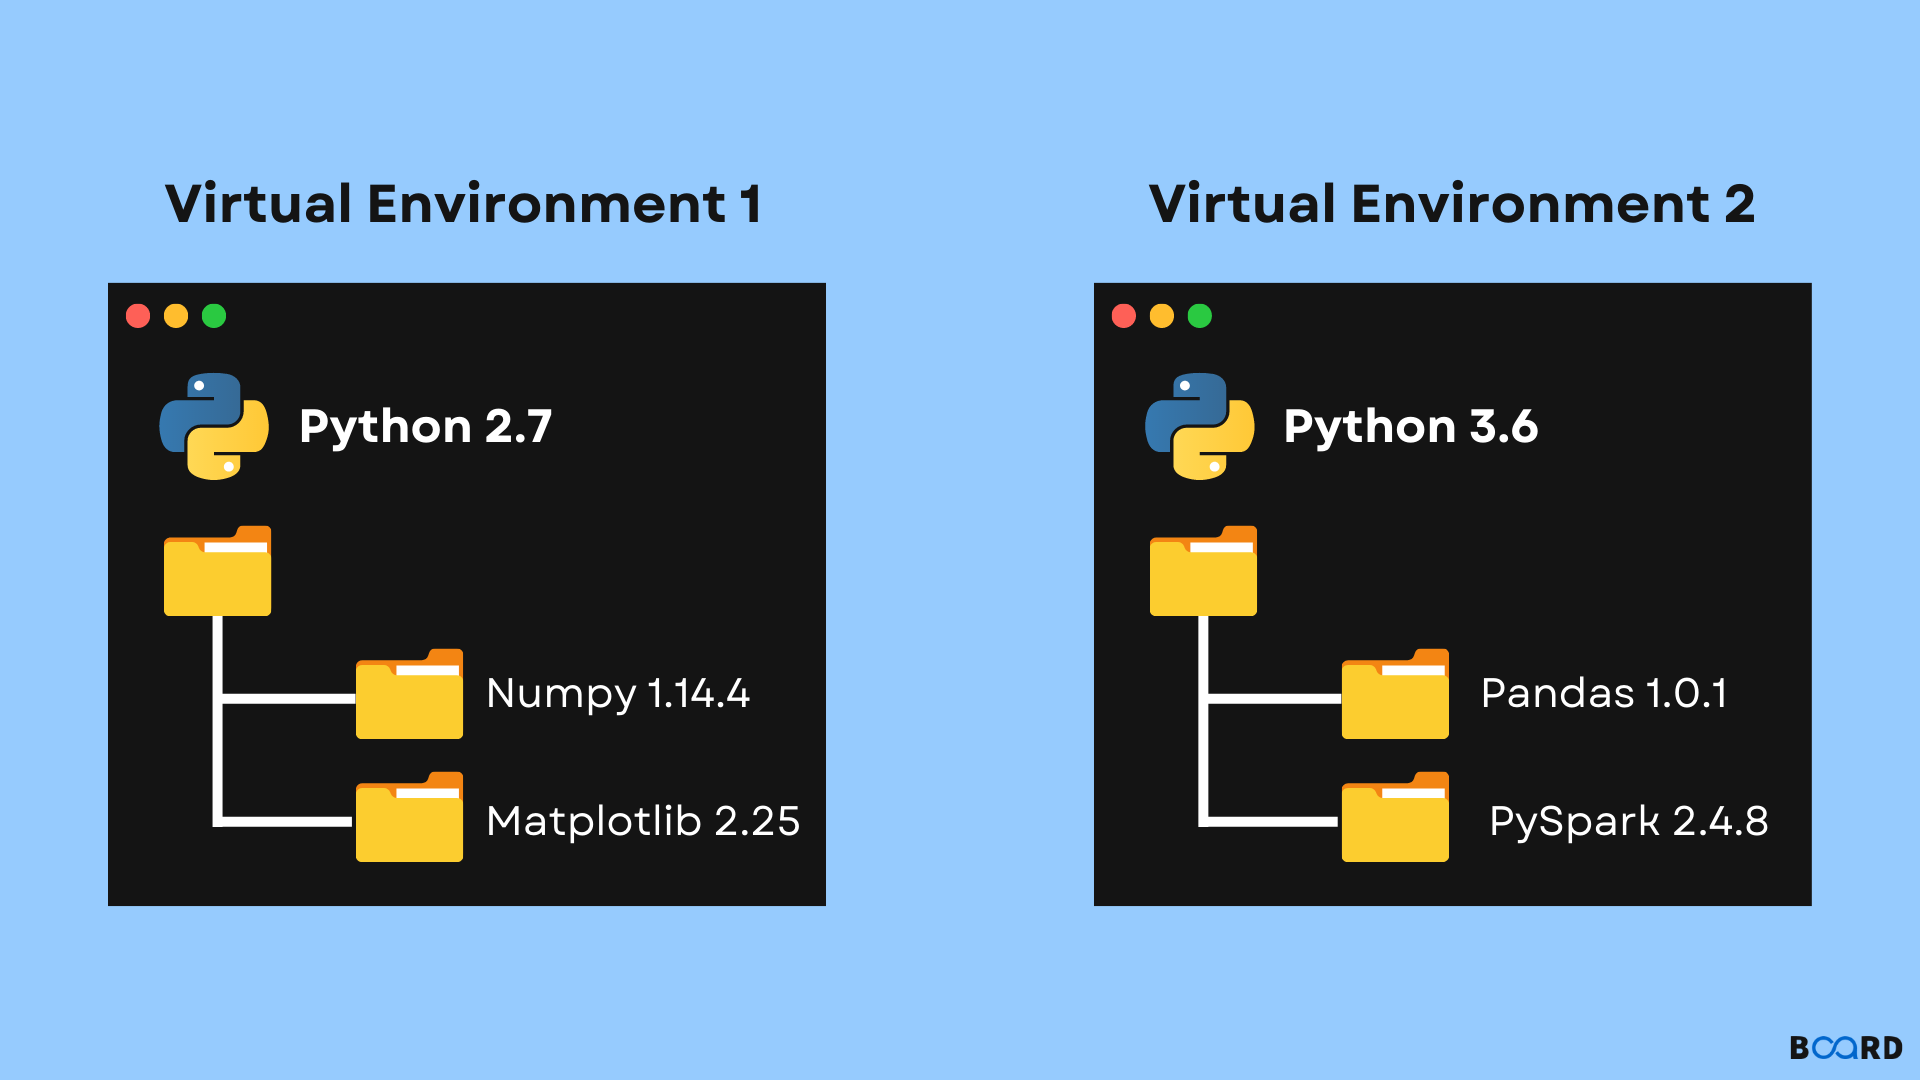
A word About Python environments
Usually, a high barrier for newcomers to Python, but in my opinion it is very important to understand and use correctly.
Most of Python Software is third-party open-source software, i.e. developed by the community
There are very few (but important)
built-infunctions in python, that we shall see. The rest is built upon this and the capabilities that Python as a programming language provides. Therefore, third-party software have dependencies that must be fulfilled to be used locally.In Python, software is bundled in packages or libraries. Software evolve in time (sometimes for good, and sometimes for bad). New features of a software are released in new versions of its package, but also some features can be deprecated and therefore removed in newer versions.
Python environments allow us to manage dependencies in a way that we can install what we need, without breaking everything. Or in case we brake everything, we can always delete the environment and start again :)
Environments work as "Safe place for a specific python code, where I know it will not fail and it will find all that it needs to run smoothly"
Creating and activating an Environment
There are many ways, and different python environment managers (like Anaconda, Micromamba, uv, virtualenvwrapper, etc.). Choose one and get used to it! Just choose one open-source :)
Default virtual environment manager with python 3:
venv(documentation)python -m venv /path/to/new/virtual/environment source /path/to/new/virtual/environment/bin/activate
The first line creates an environment in /path/to/new/virtual/environment (change accordingly). The second line activates the created environment by sourcing its activate binary executable.
Creating an environment should be done once, activating it should be done everytime we want to work on that environment!
If you are familiarized with bash, you can alias this source ... line in your ~./bashrc to have a fast activation command.
Useful commands when working with environments
We will use pip(documentation) to manage the Python packages of our environment.
- Install a python package named
<package>
$ pip install <package>
- list all python packages in current environment
$ pip list
- show information of package
<package>if installed in environment
$ pip show <package>
- show python executable that is being used in your environment setting
$ which python
.
Scripting and Running Python
There are multiple ways of writing and running code in Python:
From the terminal, using inline code editors and executing by command line interface.
$ python my_program.py
Installing
jupyter notebookorjupyter lab(IDE) and starting an instance by running:$ jupyter lab $ jupyter notebook
Installing other IDE, like
Visual Studio Code (VSC),PyCharm, etc. and running through the IDE.
I personally use all three options, but prefer Visual Studio Code (VSC) for big projects because of the versatility of its Extensions.
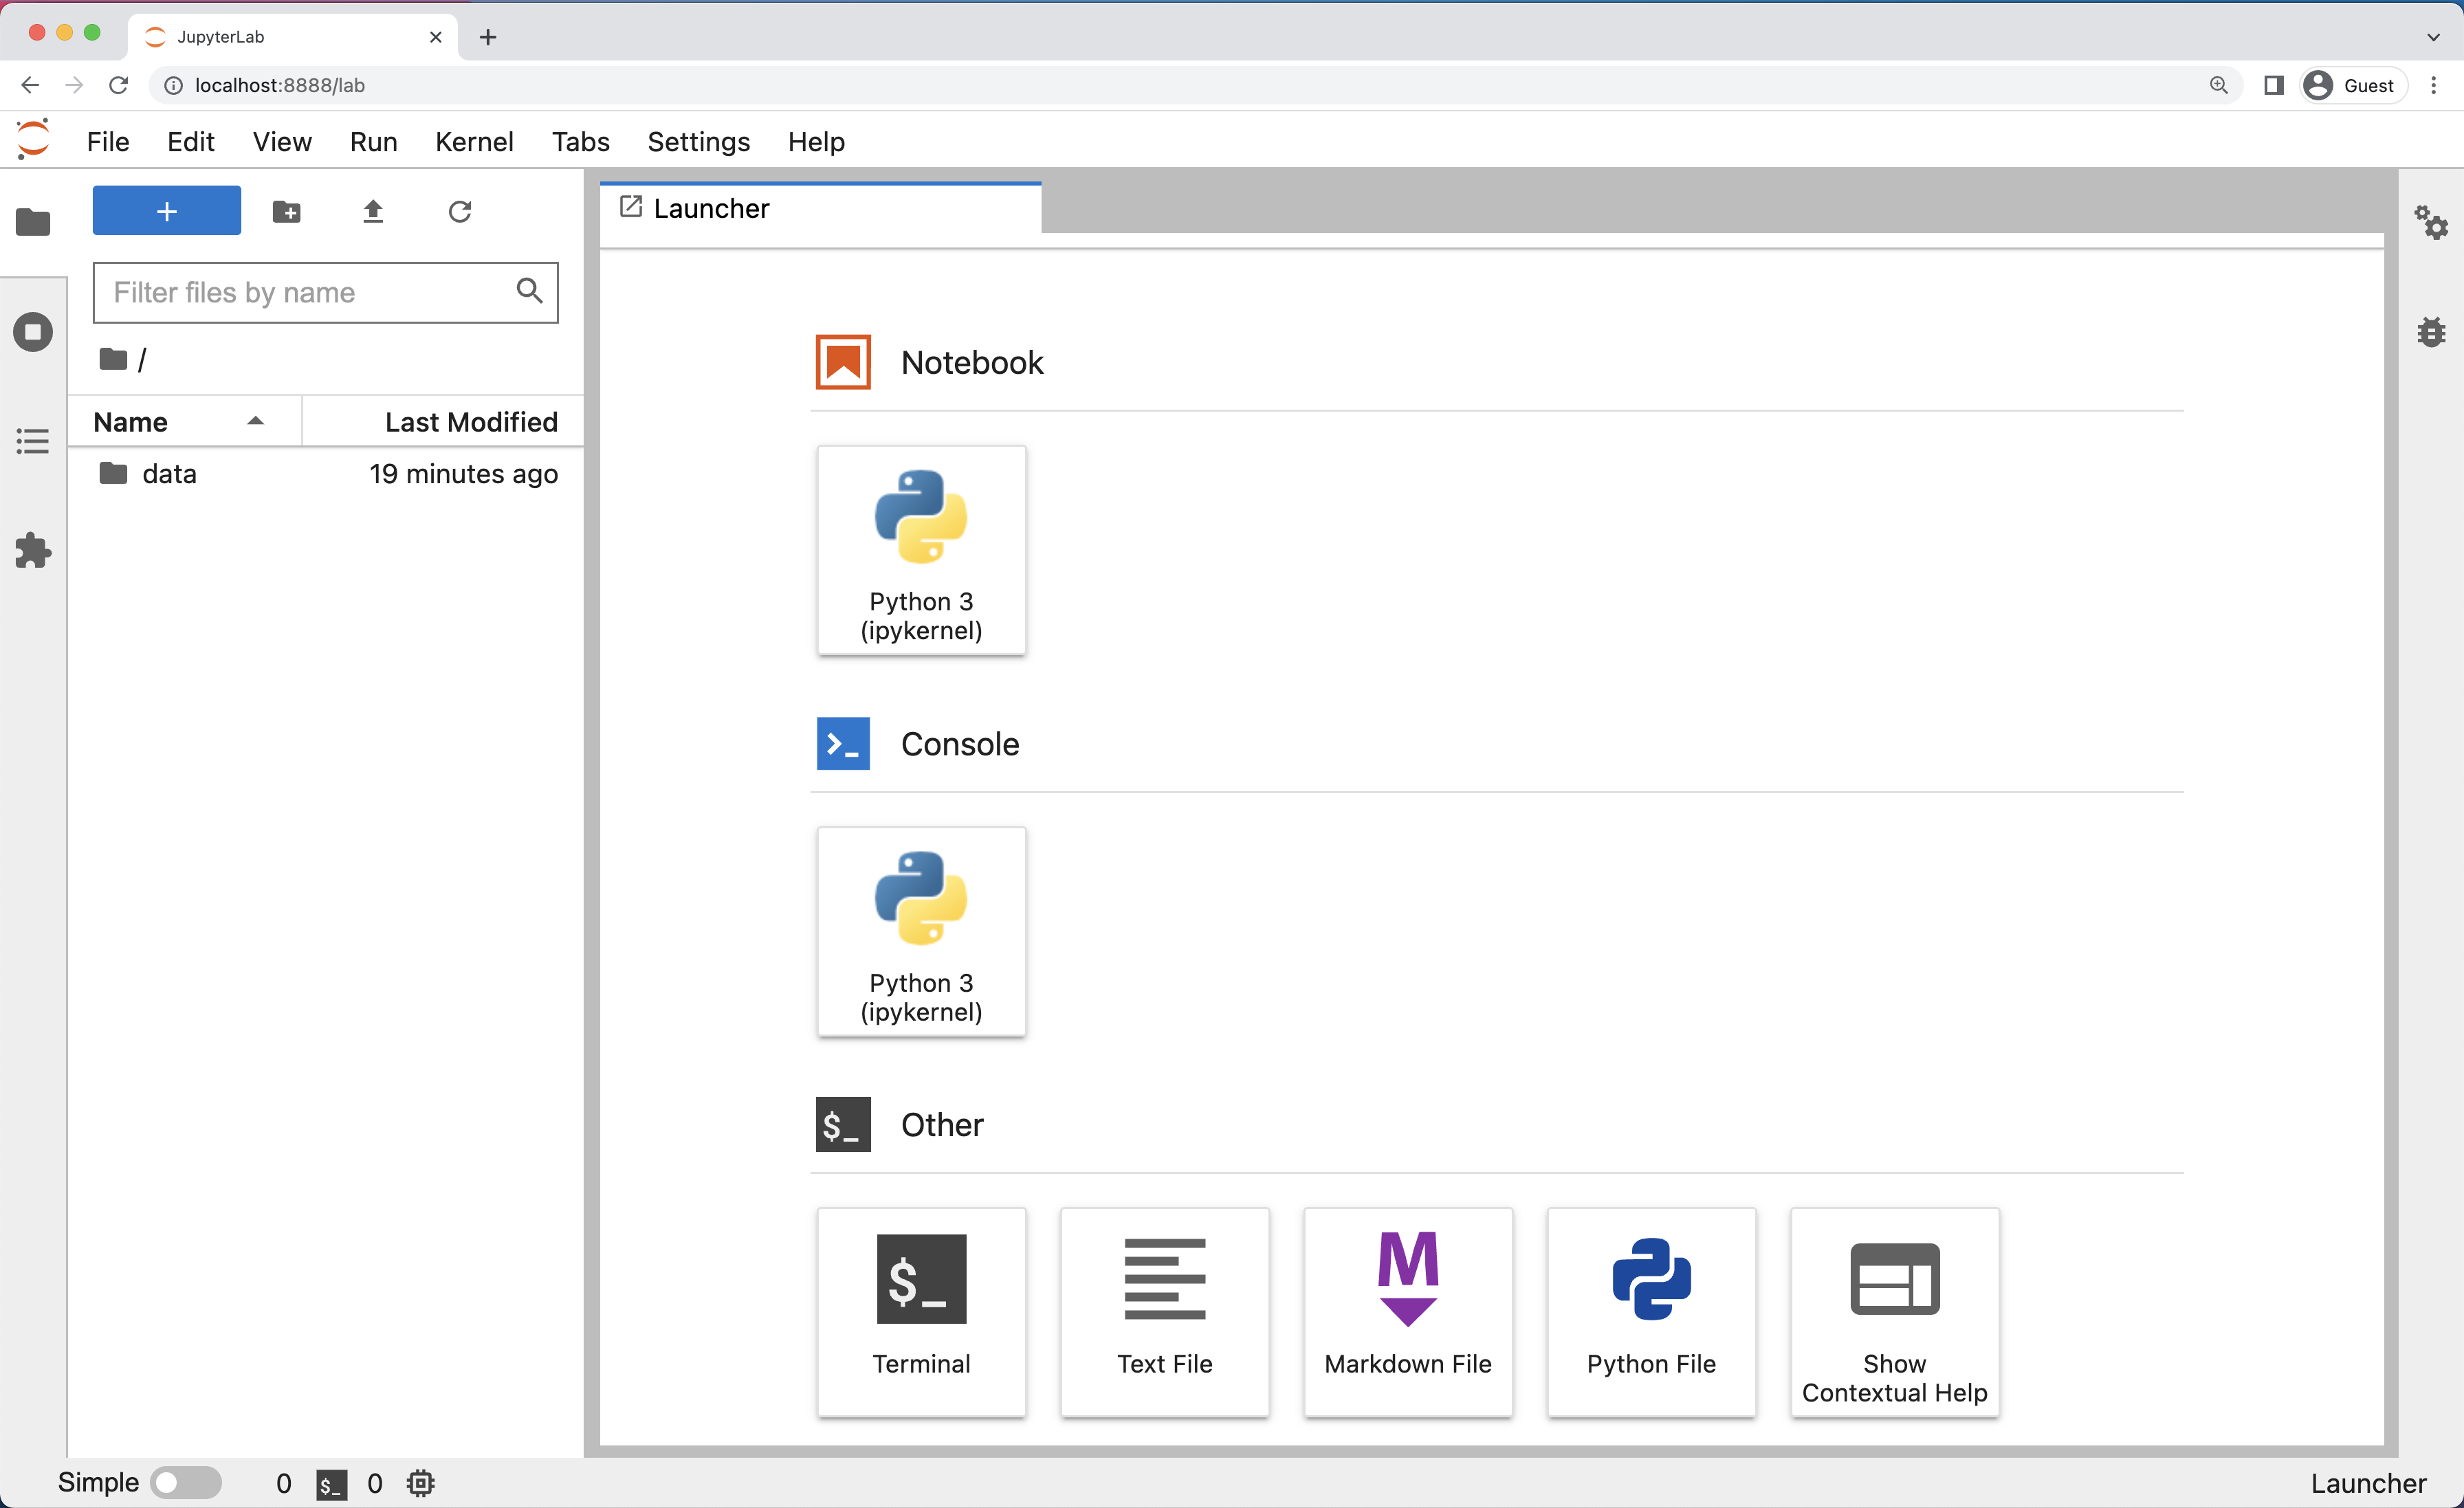
Installing and running Jupyter Lab
To install in our environment (two options):
pip install jupyterlab
or
python -m pip install jupyterlab
to run:
jupyter lab
This should open an instance of jupyter lab in your default browser.
Example showing several files open
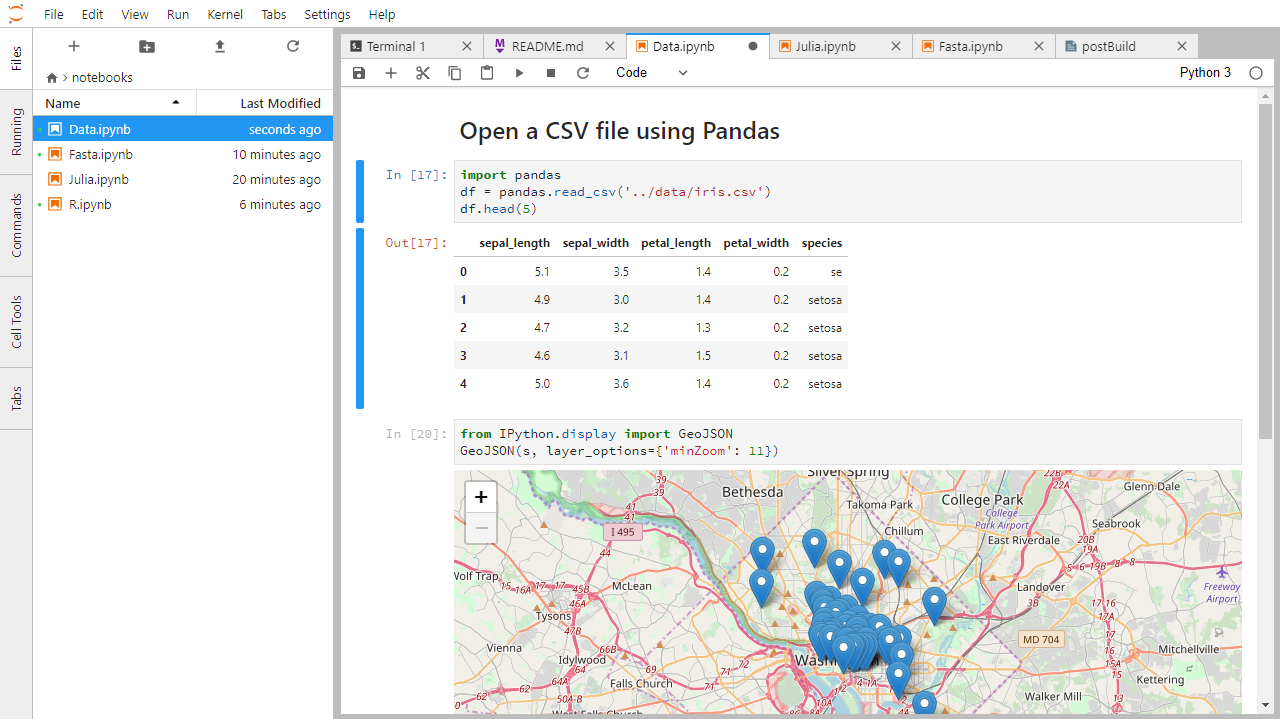
Notebooks are stored in JSON format.
Not easy to read, but the web interface knows how to understand it.
Jupyter notebooks allow mixed source code, text, images, and cell execution, amongst other benefits.
They are great for exploring data!
Notebooks have
CommandandEditmodes. If you pressEscandReturnalternately, the outer border of your code will change from gray (Command) to blue (Edit).When in Command mode (esc/gray),
- The b key will make a new cell below the currently selected cell.
- The a key will make one above.
- The x key will cut the current cell.
- The v key will paste the last cut cell.
- The z key will undo your last cell operation (which could be a deletion, creation, etc).
All actions can be done using the menus, but there are lots of keyboard shortcuts to speed things up.
Excercise 1
Open a jupyter lab instance on your local computer and create a jupyter notebook instance named excercise01.ipynb.
Once in your new notebook and in the first cell, write (copy-paste, no editing)
import this
and excecute the cell.